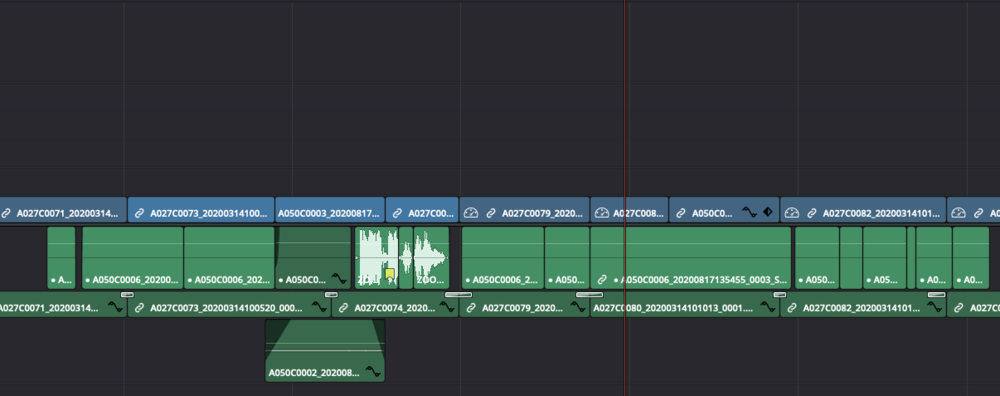
DaVinci Resolve 16 Missing Audio Waveforms Fixes
Right click on the blank audio track (or highlight multiple blank audio tracks). Click on Clip Attributes...

Just this morning, I had the unnerving experience of opening a DaVinci Resolve project that I had been working on for three months to find half of the audio tracks were missing waveforms. When I played the timeline at these areas, those audio tracks with missing waveforms played back exactly what the waveforms were showing: nothing.
I had recently consolidated the project using Media Management and relinked the tracks. In theory, a full consolidation would keep everything intact without issue. But then this happened.
It took an absurd amount of Googling to find the answer to this problem. If this is your issue, I’ve condensed the solution that originally worked for me below as well as several other options to try out.
Methods
Re-Enable Audio Track
Convert Audio Track to a WAV or Other Format
Update Your Cache File Location and Clear Your Cache
Deactivate Controlled Folder Access
Copy Audio from a New DaVinci Project
Method 1: Re-Enable Audio Track
Right click on the blank audio track (or highlight multiple blank audio tracks). Click on Clip Attributes.
Navigate to Audio Settings and confirm if the audio track is set to disabled. In my case, all of the blank audio tracks were the result of DaVinci randomly disabling some audio tracks and not others.
Enable the audio track. The waveform should appear and audio should return on playback.
Method 2: Convert Audio Track to a WAV or Other Format
At times, if an audio track is using a file type that DaVinci does not support, the audio will not play back in it. The quickest fix is to open the audio or video file in a DAW (Digital Audio Workstation) that supports the file type of the audio and then export just the audio track. Once exported, the new audio track can be linked up to the existing audio file inside DaVinci.
If you don’t have a DAW, I highly recommend getting Reaper. It is a highly flexible audio workstation that supports pretty much every file type. All VST and other audio plugins work inside Reaper. The noise reduction toolset built into Reaper is better than Adobe Audition’s noise reduction tool. best of all, at least for this issue, you can open video files inside Reaper and export the audio.
Reaper is free to download and use for 2 months. After the 2 month period, they ask you to purchase a license for $60. Not bad.
Method 3: Update Your Cache File Location and Clear Your Cache
Sometimes the cache fills up, and when it gets full, you’re unable to get audio playback. Other times, the cache location is in the wrong spot.
Head to your Project Settings and then Master Settings. Scroll down to Working Folders. Look at where the cache is located. A downside to DaVinci is if you, like me, prefer to store cache files with the project itself, these Working Folders need to be updated on a project-by-project basis.
After updating your cache location, you may start to see waveforms pop up. If not, then clearing the cache is the next step.
To clear the cache, navigate to the address for “Cache files location’ (shown under Working Folders in Master Settings). Delete what is there. Reload DaVinci.
You can also delete the cache by clicking on Playback from the top menu bar and selecting Delete Render Cache. There could also be issues with optimized media, so if you feel up to it and don’t have too much optimized media, try selecting Delete Optimized Media as well.
Method 4: Change Windows Settings and Deactivate Controlled Folder Access
Okay, this one is for Windows users. Open Windows settings and type “File System” into the search bar. You’ll see a suggested option for “File system privacy settings.” Click on that.
Ensure that both “File system access” and “Let apps access your file system” are enabled.
Next, type “threat” into the search bar and click on the suggested “Virus & threat protection” option. You can also just navigate there if you know where it is.
Once there, click “Manage settings,” scroll down to “Controlled folder access” and click “Manage controlled folder access.” Disable this feature; occasionally, DaVinci will be unable to access the drive if this setting is enabled.
Method 5: Copy Audio from a New DaVinci Project
If none of the options above work for you, try creating a new DaVinci project and importing the audio files into that new project. If the audio files show up in that project but not the old project, then you may have a corrupt project file on your hands.
If this is the case, then try saving the project as a new project and restarting DaVinci.
If this doesn’t work, then create a brand-new project where you can see the waveforms and import the old project into it with File > Import Project.
Hope this helps!


